Update cookies preferences
Jalpi Logo
  • Pricing
  • Solutions
    • Education
    • HealthCare
    • Marketing Agencies
    • Ecommerce
    • Travel and Tourism
    • Restaurant & Food Business
    • Beauty & Cosmetics Brand
    • Spas and Salons
    • Automotive Industry
    • Home Decor & Furnishings
    • Real Estate
    • Freelancer and Consultant Sales
    • Banking & Finance
  • About
  • Contact
  • Resources
    • Blog
    • KnowledgeBase
    • Developers API
  • BOOK DEMO
  • Login

Categories

  • 8 Inbox & Channel
  • 1 Chatbot
  • 3 Contact
  • 3 WABA Messaging
  • 1 Pricing & Plans

Popular Articles

  • How an Inbox System Enhances Customer Communication?
  • How a User Agent System Enhances Operational Efficiency?
  • How a Channels System Enhances Communication Efficiency?
  • How to Use WhatsApp Chatbot Drag & Drop Editor
  • How to Add Jalpi Web Widget in Shopify Store

Latest Articles

  • WhatsApp Message Template Formatting Rules
  • How to Blacklist Conversations: A Step-by-Step Guide
  • Creating Effective Automation Rules for WhatsApp Business API Messaging
  • Canned Responses for Inbox
  • Recurring Based Plan

How to Add Jalpi Web Widget in WordPress Site

/ Inbox & Channel /How to Add Jalpi Web Widget in WordPress Site
  • February Tue 20, 2024
  • Inbox & Channel
  • Total Views:  695

Adding the Jalpi Web Widget to your WordPress site involves a few steps. Follow these instructions:

Step 1: Navigate to your WordPress admin site.

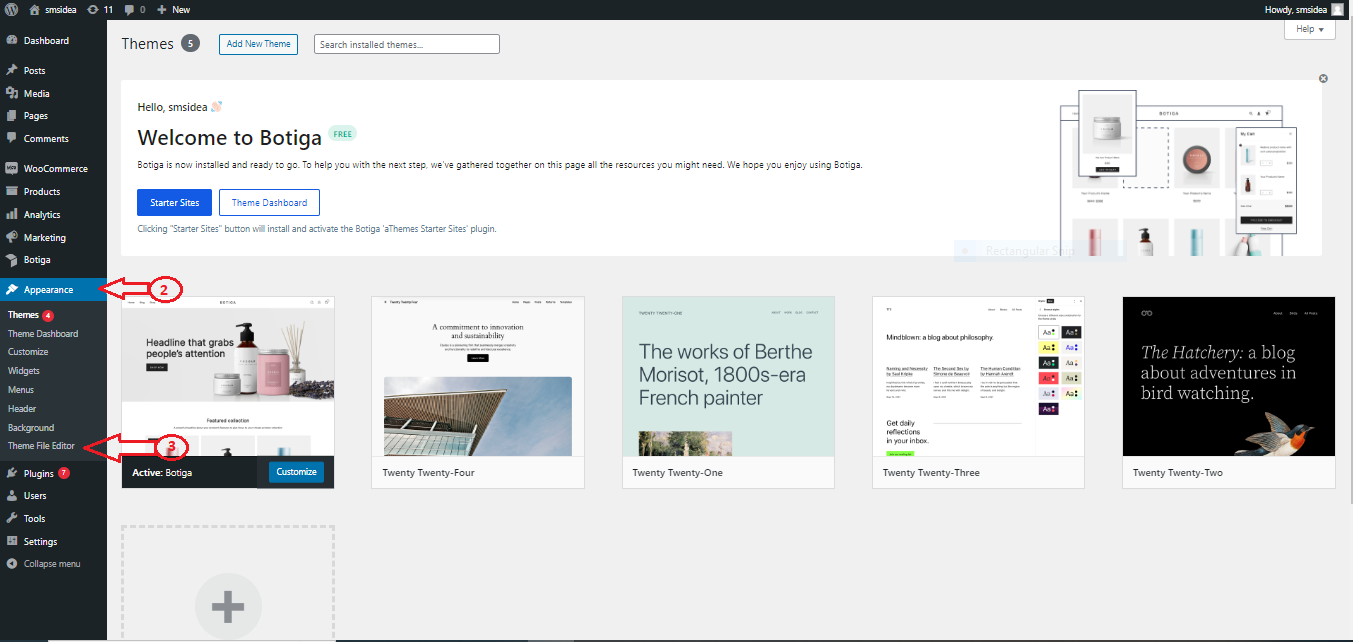
Step 2: Go to Appearance

Step 3: Click on the "Theme File Editor" located on the left side of the screen.


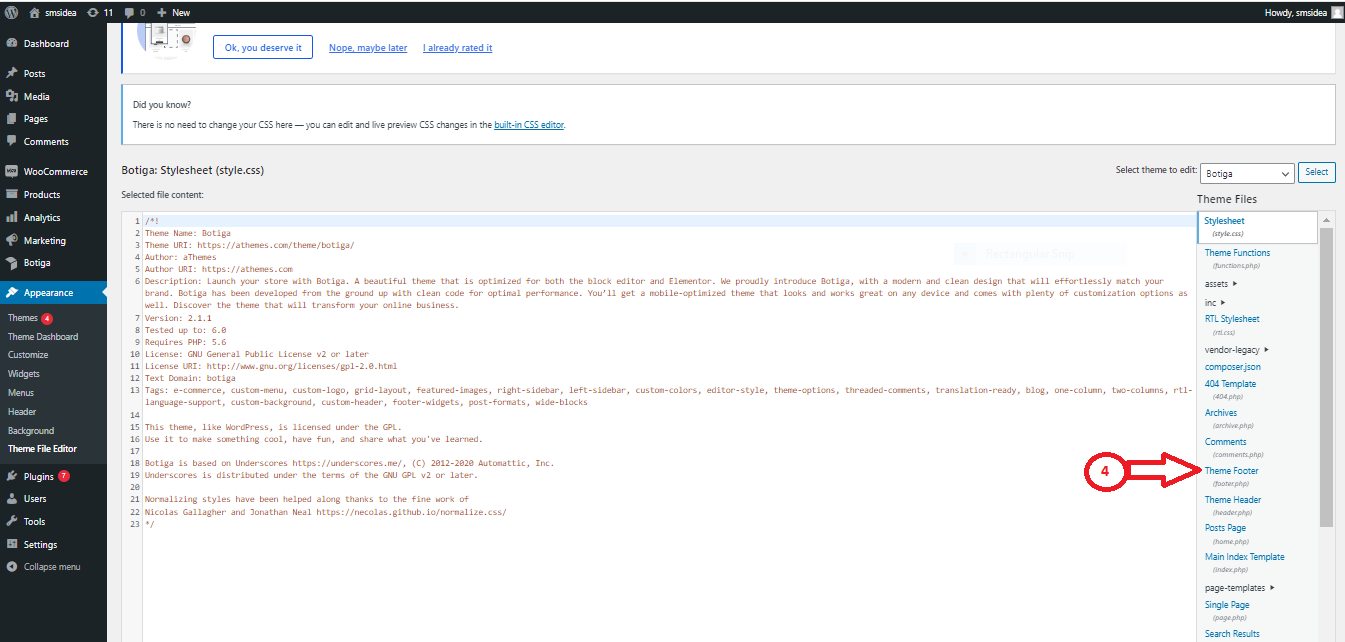
Step 4: In the Right side corner, click on the “Theme Footer”.


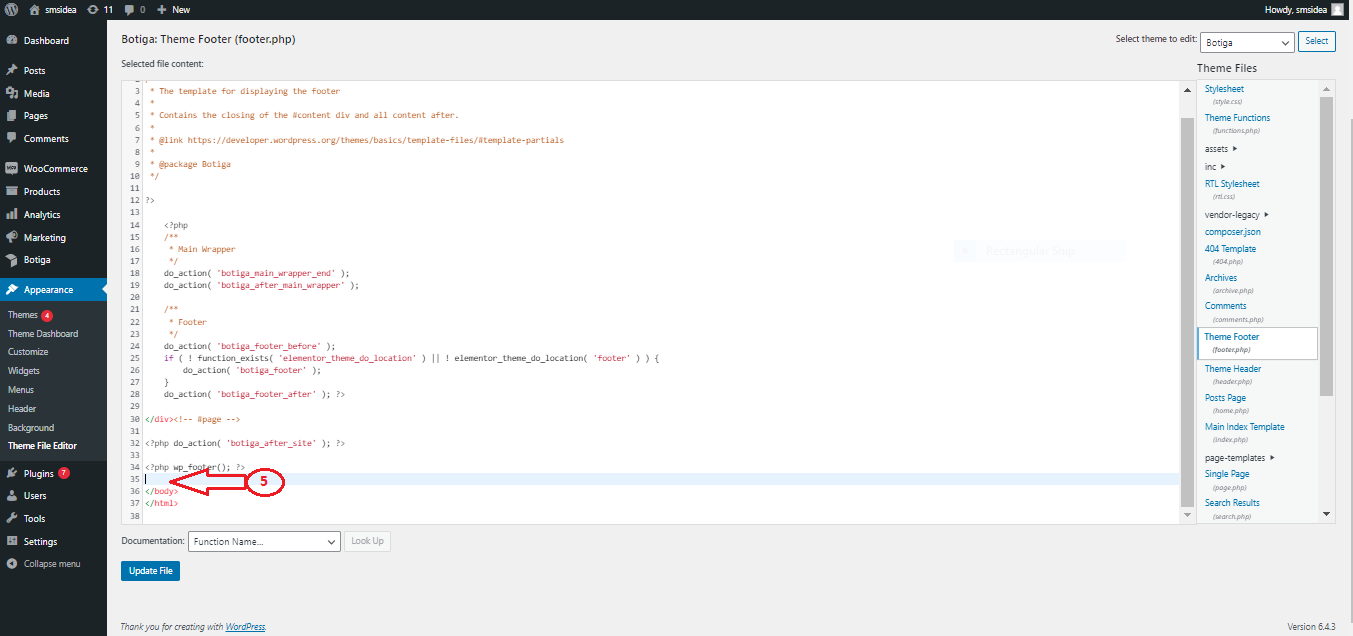
Step 5: In the right-side code, insert your JavaScript code just above the “</body>” section. Obtain the Web Widget JavaScript code from the Jalpi website by following below steps:

  • Register at jalpi.com if you haven't created an account.
  • Navigate to the "Channels" option on the left-side menu.
  • Add a new channel by clicking "Add Channel" and select "WebChat."
  • Fill in the required information and obtain the script tag from the Configuration tab. This JavaScript code should be placed in the WordPress layout body tag, as mentioned in Step 5.


Step 6: Update your file with the changes and refresh your site to see the results.

jalpi Logo

Send WhatsApp marketing messages and transactional notifications to your customers using WhatsApp Cloud API

ISO 27001 ISO 9001 Meta Business Partner
Jalpi
Login / Client Hub
About Us
Free Trial
Pricing
Contact Us
FAQ's
Resources
Developer API
Blog
Knowledge Base
Inbox & Channel
Chatbot
Contact Management
WABA Messaging
Resources
WhatsApp Business for Education
WhatsApp Business for Healthcare
WhatsApp Business for Marketing Agencies WhatsApp Business for Ecommerce WhatsApp API for Hospitality
Business Communication Strategies
How to Apply for Green tick
How to Set Up WhatsApp Cloud API
Generate Organic Leads Using WhatsApp
Terms & Conditions | Privacy & Policy| Cookies Preferences
© Copyright 2025. Jalpi by KonceptWise Digital Media Pvt Ltd. Chat on WhatsApp