How to Set Up WhatsApp Cloud API on Meta (Step-by-Step Guide)?
Introduction:
Setting up a WhatsApp Cloud API on Meta (formerly Facebook) is a crucial step for businesses looking to enhance their communication with customers. In this comprehensive guide, we'll walk you through the entire process, from creating your Meta account to business verification and display name approval. Let's get started.
Step 1: Creating a Meta Account and WhatsApp Cloud API App
- Begin by registering for a free Meta developer account if you haven't already. Go to developers.facebook.com and login with your facebook credentials.
- Initiate the process by clicking on the "Create App" button.
- When prompted to select the use case for your app, opt for the "Other" category.
- Choose the "Business" option on the following page and proceed by clicking the "Next" button.
- On the subsequent page, provide a name for your app and an email contact. In the "Business Account" field, choose an existing business account or leave it as "No Business Manager account" if you don't have one. Then, click the "Create app" button to proceed.
- You'll be directed to your App page, where you'll need to add products to your app. Scroll down to locate the WhatsApp product and click on "Set up."
- On the WhatsApp Business Platform API screen that follows, you'll have the choice to either select an existing Meta Business Account or create a new one. Make your selection and then click "Continue."
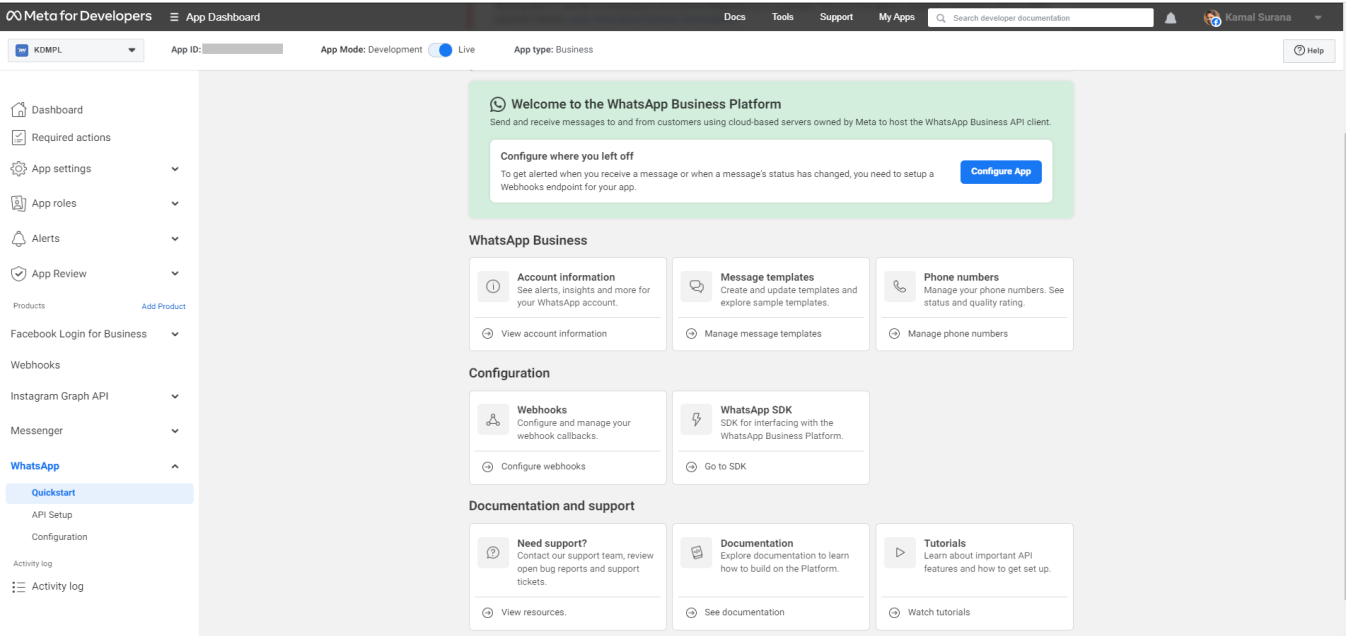
- You'll then be redirected to the Quickstart page, which should resemble something like the example provided.
Step 2: Adding Your Contact Information
- Navigate to the WhatsApp > API Setup page from the sidebar, and then scroll to the bottom of the screen to locate the "Add phone number" button.

- Upon clicking the button, a new window will appear for setting up your WhatsApp Business profile.(Note: Avoid using placeholder names; use your actual business name for the Display Name.)
- Now, it's time to link your phone number for WhatsApp API usage. Enter your phone number and select a preferred verification method for verifying your number.(Note: Keep in mind that once you associate a phone number here, it becomes connected to the WhatsApp Cloud API, and you won't be able to use it with the mobile app.)
- Enter the verification code received and click "Next" to complete the process of adding your phone number.
Step 3: Setting Up Webhooks
- To enable webhooks, begin by going to the "WhatsApp" section in the left sidebar, then select the "Configuration" link.
- Look for the "Edit" button and click it. This will open a pop-up window.
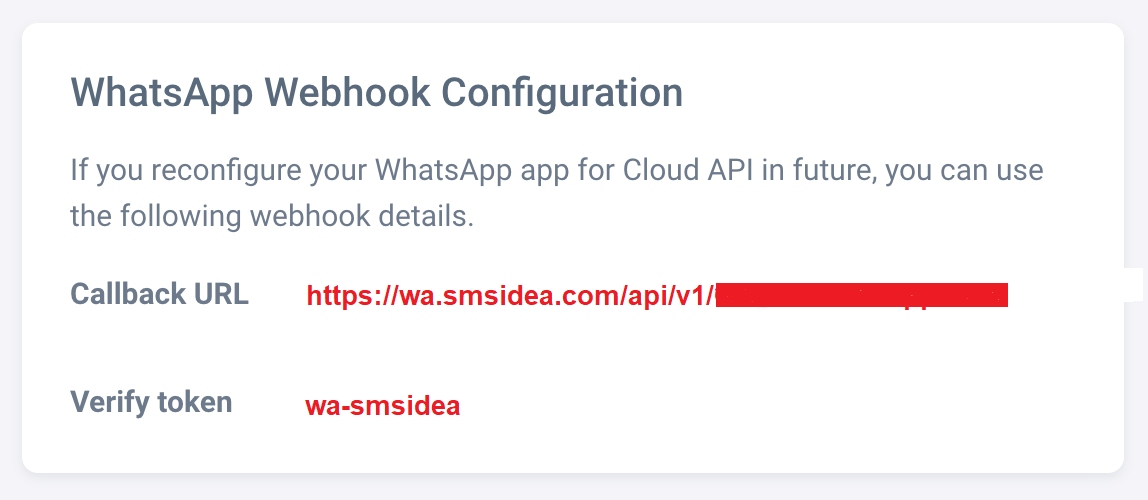
- Inside the pop-up, find the "Callback URL" field. You'll need to input the callback URL. At this step if you have not created an Account on JALPI Platform, then you will need to Register your organisation on www.jalpi.com.
- After that in the Call back URL Enter: https://app.jalpi.com/api/v1/OfficialWhatsappHook
- In the "Verify Token" field, enter the token "wa-smsidea" and proceed to click the "Verify" button.
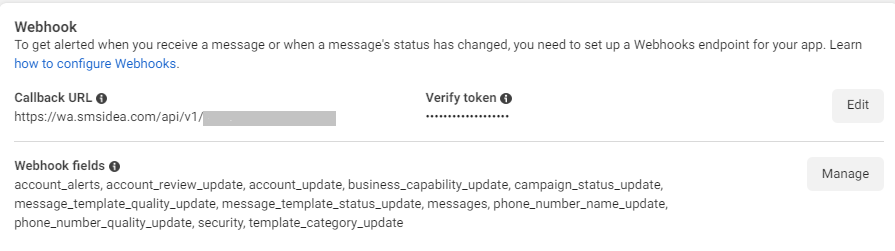
- Below, you'll see the "Webhook fields." Click on "Manage."
- In the new pop-up that appears, click "Subscribe" in front of each field. It's essential to subscribe to all the fields for seamless integration with your messaging service.
- Finally, click "Done" to finish setting up your webhooks. Your webhooks configuration should now be complete and ready to use.
Step 4: Creating a Permanent Access Token
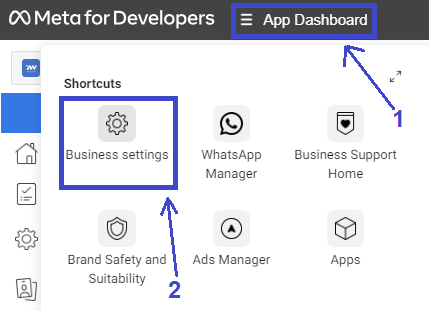
- To create a permanent access token, begin by navigating to the top of the page and click on "App Dashboard" next to the Meta for Developers logo. If you're on a desktop, you can right-click on "Business Settings" to open it in a new tab. Ensure you keep the current "App Dashboard" tab open.
- Inside the "Business Settings" page, you'll find a left sidebar. Click on "System Users" under the "Users" section. Then, proceed to click on "Add" to create a new user.
- If you encounter a non-discrimination policy popup, click on the "I Accept" button to continue.
- Now, provide a name for your system user (you can simply use "system"). Choose the role for the system user as "Admin" and click on the "Create System User" button.
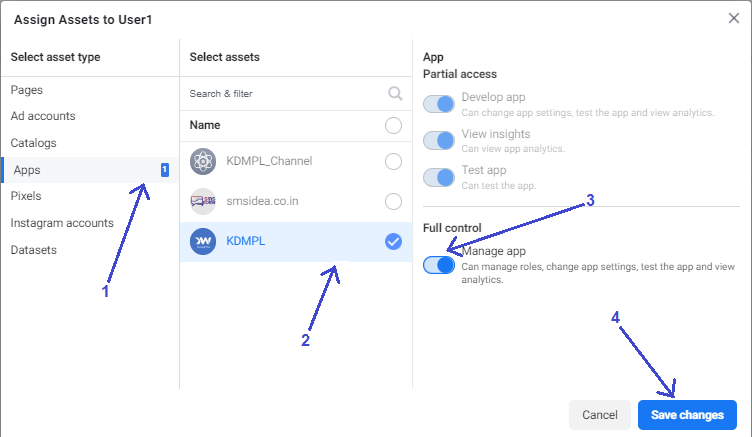
- Next, click on "Add Assets." Under "Select Asset Type," choose "Apps," select your app from the "Select Assets" column, and enable "Full Control" for "Manage App." Afterward, click on "Save Changes."
- Proceed to click on the "Generate New Token" button. From the dropdown menu, select your app and choose "Token Expiration" as "Never."
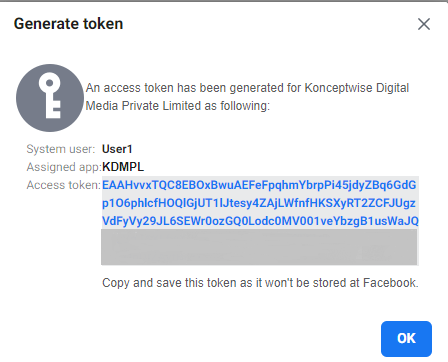
- In the list of permissions under "Available Permissions", select "WhatsApp Business Messaging" and "WhatsApp Business Management." Finally, click on the "Generate Token" button.
- Now, copy the access token that is generated.
- Now as the required credentials are generated, Login to your account in www.jalpi.com and Under Whatsapp Instance > Add Instance, update all the fields like From Number, Permanent Access Token, Phone Number id, WhatsApp Business AccountId, WhatsApp Business ManagerId, App Id.
- Once you have updated the details you are setup with the number to start receiving User initiated messages and to respond to the messages. But if you want to directly send Business initiated message to people who have not interacted with your number, then you will have to complete the next step of adding the payment details.
Step 5: Adding a Payment Method
- Start by accessing the "Accounts" section in the left sidebar and navigate to the "WhatsApp Accounts" page. Locate your WhatsApp account in the list and click on the "Settings" tab.
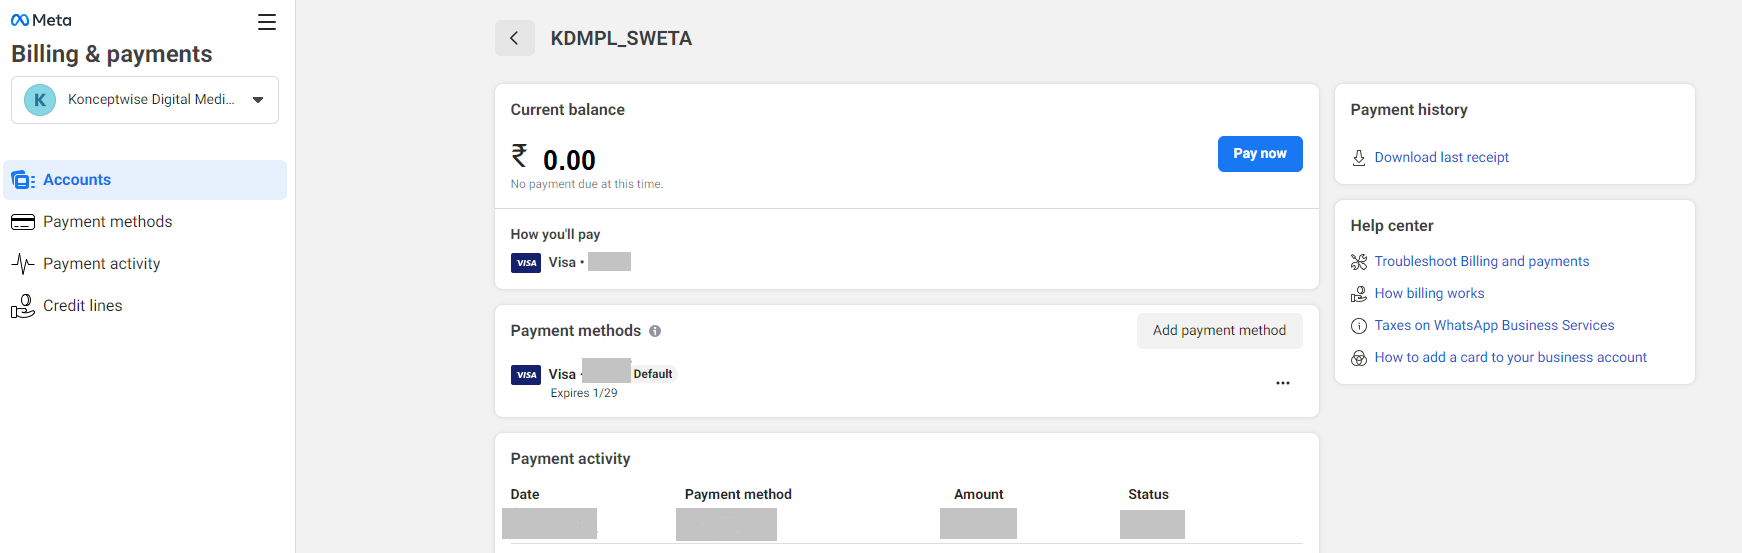
- Inside the "Settings" tab, find the "Payment Settings" button and click on it. This will take you to the Payment Settings page.
- Once on the Payment Settings page, locate and click the "Add Payment Method" button.
- You will then be prompted to select your country, currency, and preferred payment method.Make your selections and click "Next."
- Proceed to enter your payment details as required and click "Save." Upon successful addition of your payment method, you will see a confirmation screen.
Step 6: Switching App Mode to Live
- Return to the previously opened App Dashboard tab.
- Locate the "App Mode" option at the top of the page and transition it from "Development" to "Live."

- You will encounter a prompt on the screen requesting additional information, such as the Privacy Policy URL.
- Navigate to the "Settings" > "Basic" page and input your website's Privacy Policy URL. You can also provide other optional information such as the App Domain, Contact Email, and Terms of Service URL. Once you have completed these details, select "Save Changes."
- Now, once again, activate the toggle button to transition your app from the "Development" mode to "Live" mode.
Step 7: Storing and Verifying Your Credentials
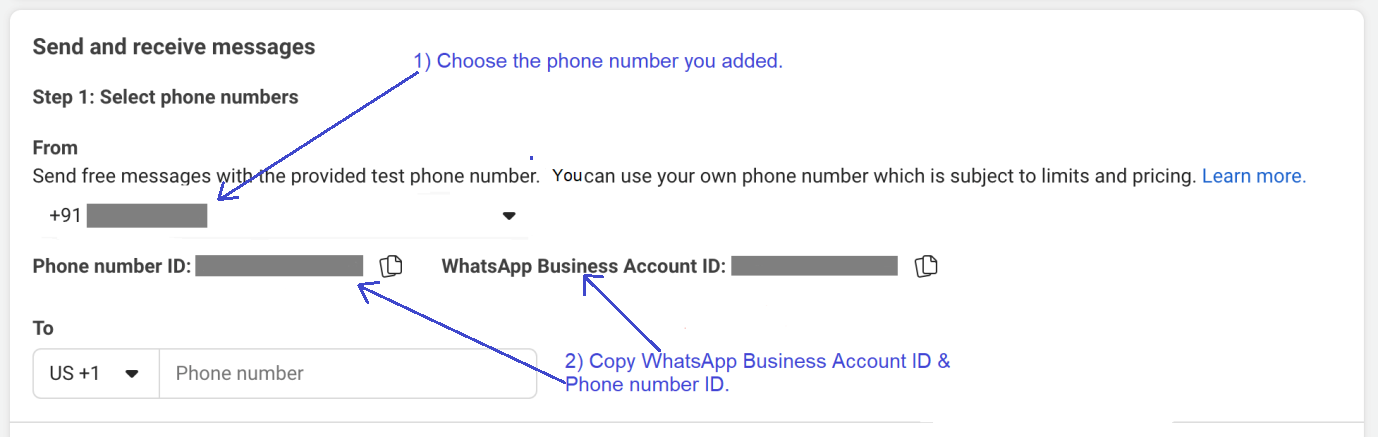
- On the WhatsApp > API Setup page, go to Step 1: Send and receive messages, located under the "From" label. From the dropdown menu, choose the phone number you previously added.
- Once you've selected your phone number, you'll notice that the Phone Number ID and WhatsApp Business Account ID fields below it will automatically update. Copy these values and paste them into the corresponding fields on the form.
- Additionally, retrieve the Permanent Access Token that you generated earlier and paste it into its designated field.
- With all the necessary information in place, click on the "Save and validate" button to finalize the setup.

Next: Business Verification
Now that you've successfully configured your WhatsApp Cloud API account, you can commence sending a limited number of messages each day. To increase this limit, allowing you to send up to 1,000 messages per day or more, it's essential to verify your business. You can find detailed instructions on how to complete this process Click to Verify Your Meta Business Account.
Conclusion:
Congratulations, you've completed the initial setup of your WhatsApp Cloud API account on Meta and now you are ready to test sending and receiving facility on www.jalpi.com . The next step is to verify your business and secure display name approval, which will enable you to enhance your messaging capabilities. Stay tuned for our next guide on business verification.